In my last post I built the bottom shelves for holding all my games. Now it was time to build the shelves that would sit on top of those. I’ve circled them in my north wall diagram below:

As I’d learned before, the key to success is a thorough plan and cut list, so I drew that up first:

Then I started construction of my pillars – just like I did with my bottom shelves:
As I was making the pillars I noticed that they weren’t coming together as precisely as my previous builds. I turns out that after making so many cuts my saw jig (which I built in this post) was getting a lot of wear and tear:
This was resulting in less precise cuts. I unscrewed the jig and put it back together cutting off the excess again to make a fresh, new edge. After that I cut the shelves and could immediately see the difference:

With both pillars and shelves complete it was time to assemble the whole module of shelving. Like before I used my Kreg jig to make pocket holes in the shelves and screw them into the pillars:

The broad strokes of construction were essentially done at this point, but I still had a lot left to do. For one, I intended to light my shelves using LED strip lights. I wanted the lights to be recessed, so I flipped the whole shelving unit over and used a router to cut out a groove on the leading edge of the shelves where I could hide the lights (photo by CraftyJill):
This is something that a should have done to the shelves before they were installed, because the pillars prevented my router from cutting all the way to the edge of the shelves:

I had to complete the rest of the groove using a hammer and chisel. I used clamps as supports to prevent my hammering from testing the strength of my pocket-hole joinery:

The groove will be hidden behind a strip of moulding that I plan on attaching to the front of the shelves.
Kreg also makes pocket hole plugs in a wide variety of woods, so I bought a couple boxes of red oak and glued them into the holes:

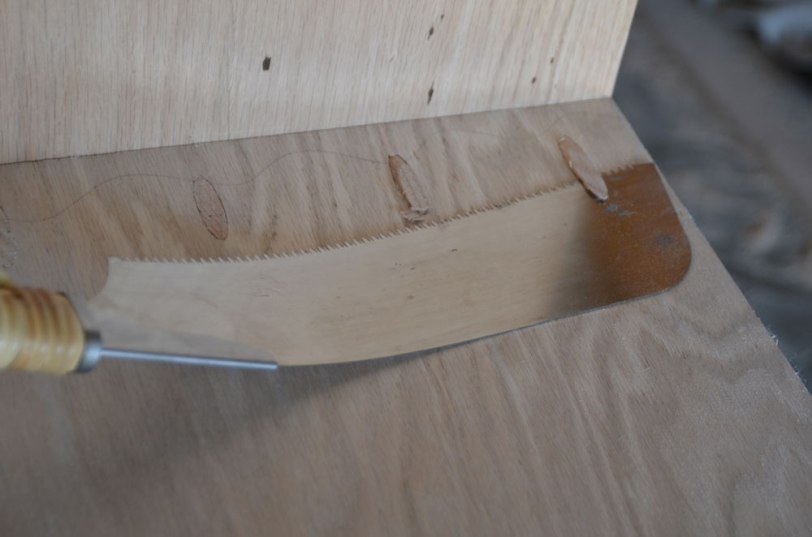
After letting them dry for twenty-four hours I used a japanese flush-cut saw to trim the excess wood. This is a flexible saw that will cut things flat with another surface without scratching it:
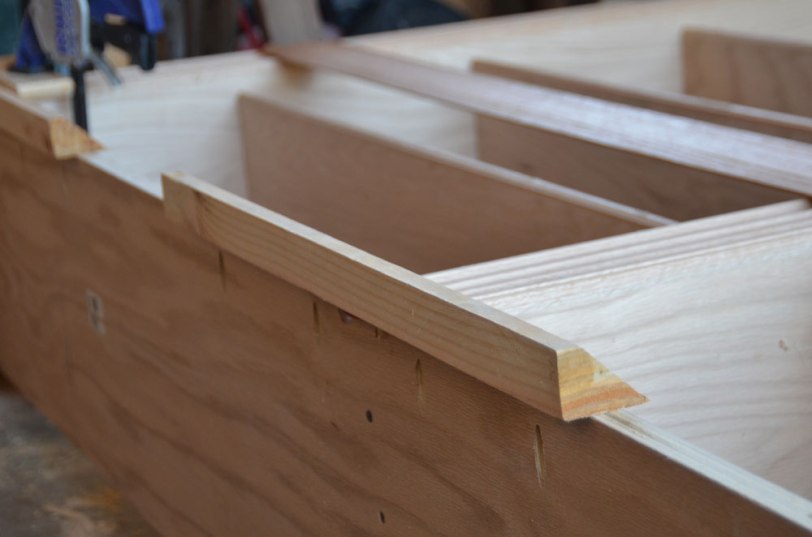
I sanded what was left of the plugs and got to work on the crown moulding that would be on top of the shelves. The first thing I did was run some lumber through my table saw with the blade set at a forty-five degree angle. These pieces were attached to the top of the shelves as a support for the crown moulding and give me something more substantial to which I could attach that moulding:
Next time we’ll stain and finish the shelves and talk about lighting them! I hope you come back to read it.
See you then!
-Jack

Your project is looking good, thanks for sharing!
You’re welcome – and thanks!
Pingback: The Game Room, Part IX: Lighting the Game Shelves | Master of None
Pingback: The Game Room, Part VII: Building the Bottom Game Shelves | Master of None
Pingback: The Game Room, Part XI: Completing The North Wall | Master of None